Slice Studio
Map one clip across your whole stage, build up to 16 Looks, and ride them live on sliders.
Map one clip across your whole stage, build up to 16 Looks, and ride them live on sliders.
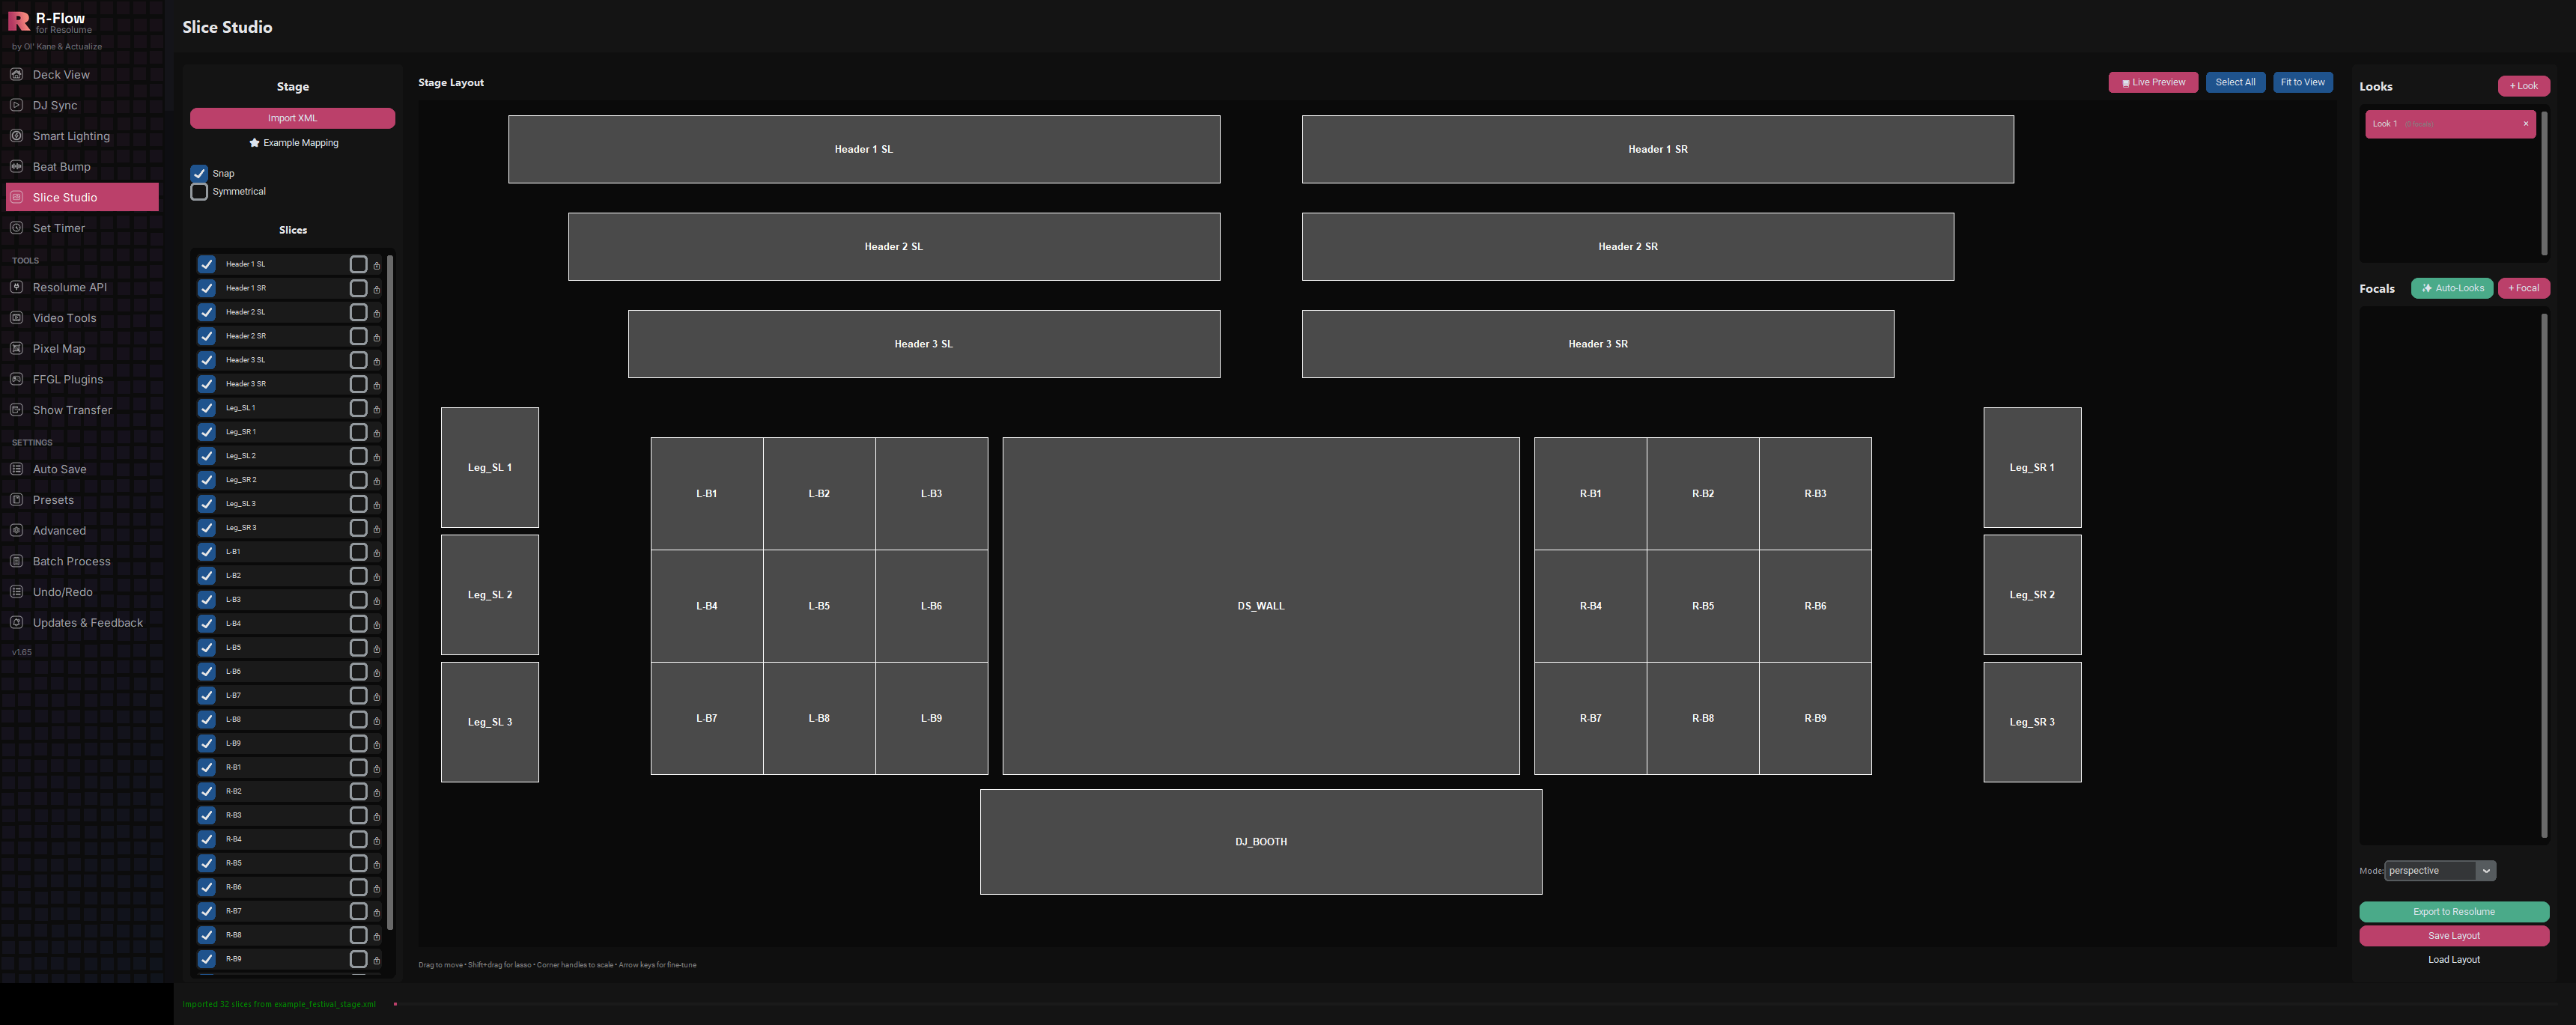
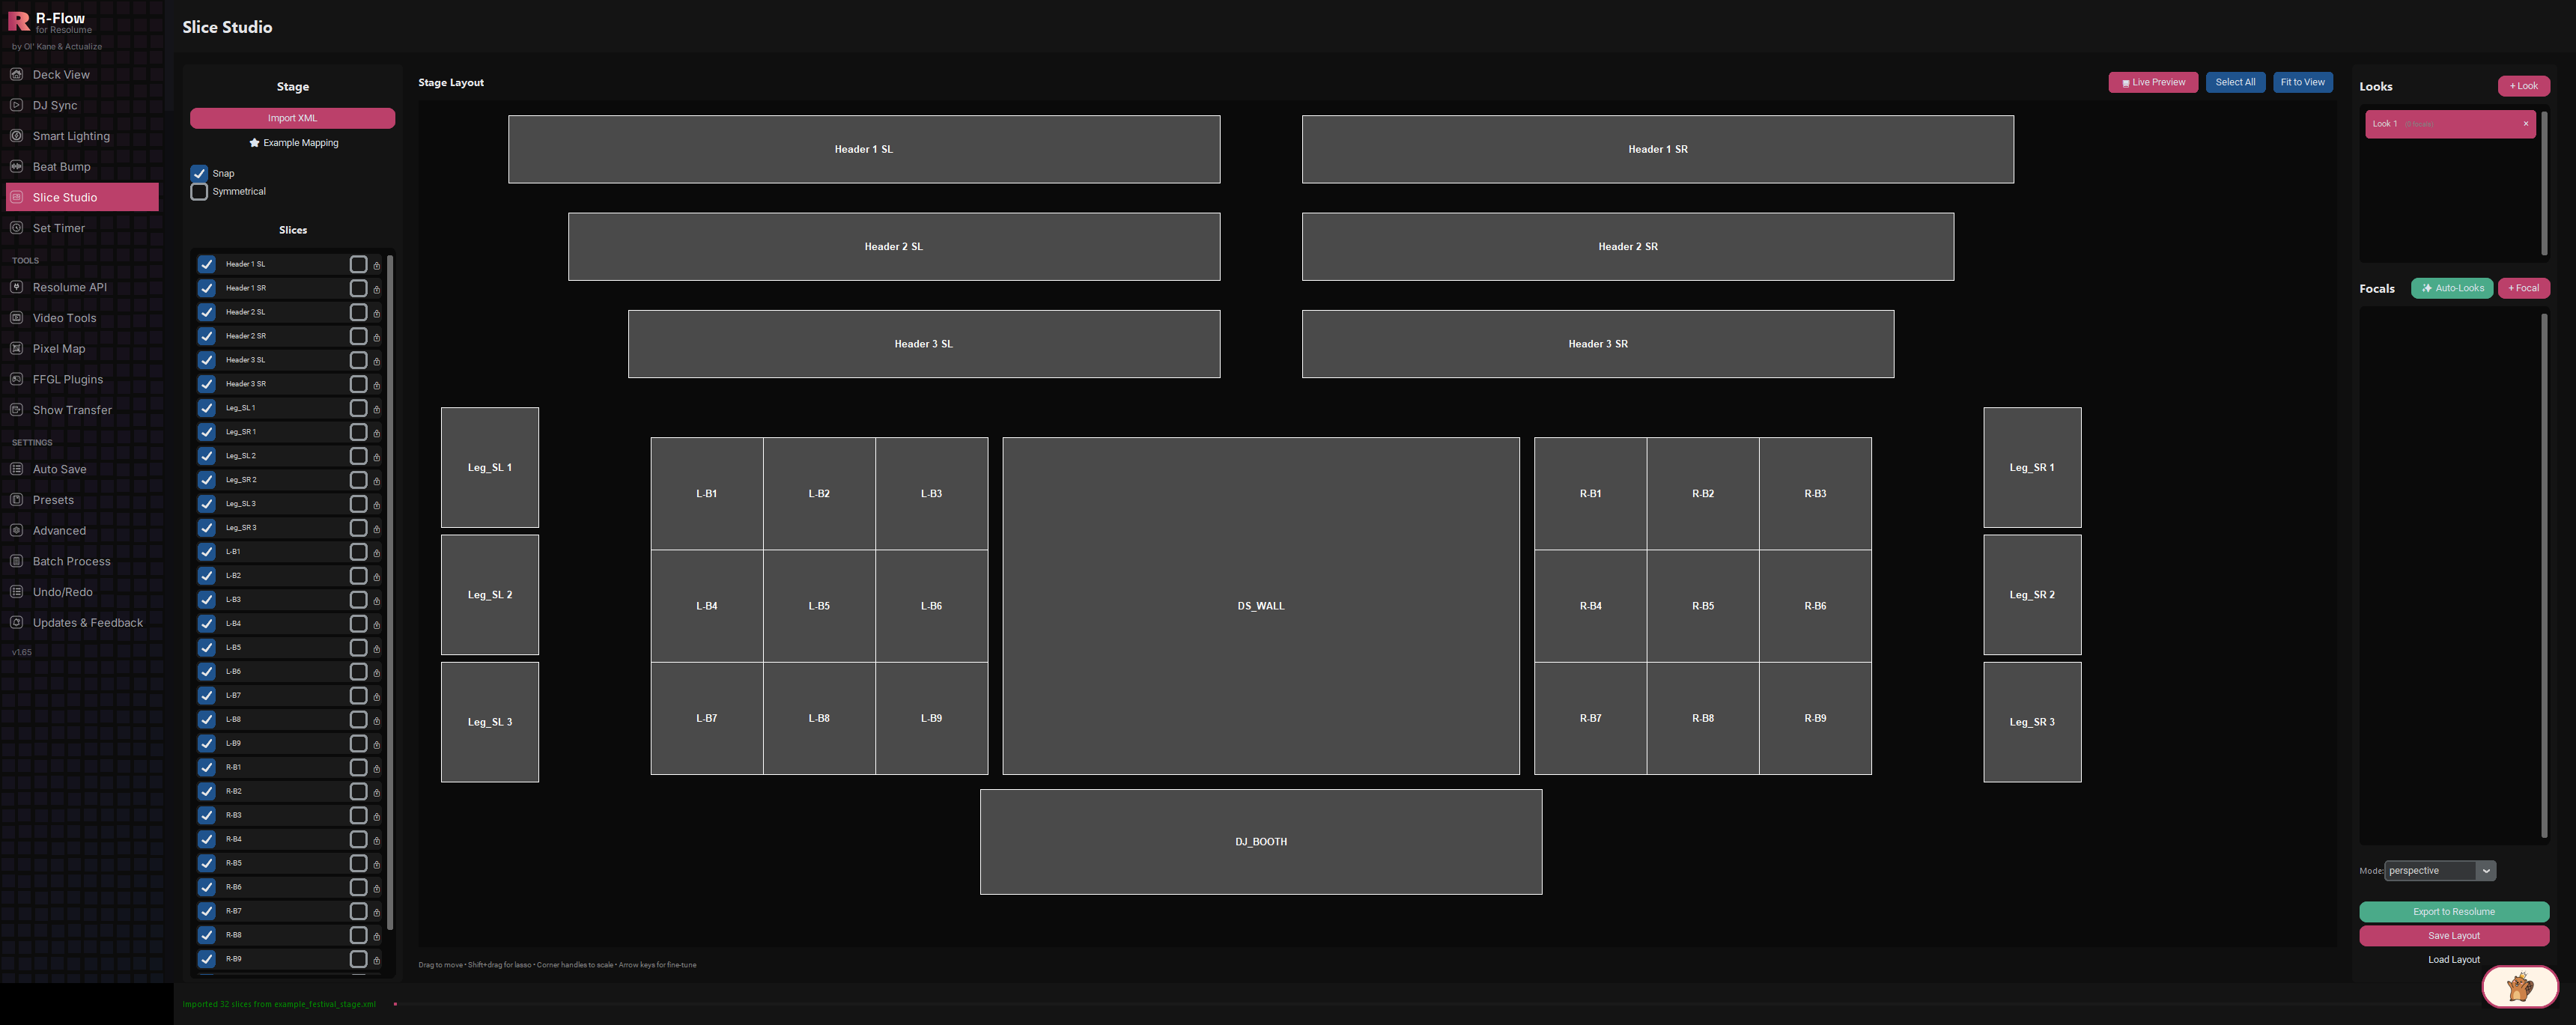
Slice Studio turns a multi-panel stage (festival LED walls, header bars, DJ booth, side wings) into a playground for a single clip. Import the slice layout you already built in Resolume's Advanced Output, group panels into Focals, and stack up to 16 different "Looks" (mirrored, duplicated, per-panel, kaleidoscope and more). Export once, drop the companion Slice Studio effect onto a clip or layer in Resolume, and each Look becomes a fader you can push, blend and beat-match during the show. A built-in live preview runs the exact same mapping math as the plugin, so what you see in R-Flow is what hits the wall.
Load any Resolume Advanced Output XML preset and every slice appears on an interactive canvas, laid out by its input selection, complete with names, per-slice show/hide and lock toggles. A bundled Example Mapping (a symmetric 32-panel festival stage) lets you try everything before touching your own show file.
Select panels on the canvas and group them into Focals; collect Focals into Looks (up to 16). In Resolume, each Look is its own opacity slider on the effect, so you can crossfade between full-stage layouts mid-set, blend several at once, or snap between them on beat.
One click reads the geometry of your imported panels (no naming conventions required) and builds a set of ready-to-play Looks: a per-surface base plus flip, mirror, duplicate and kaleidoscope variations. More physical surfaces means more variety.
Perspective mode spans content continuously across a Focal's panels, closing the physical gaps so one image reads across the whole surface. Duplicate mode fills each panel with its own copy. Add horizontal/vertical flips per Focal; centre-mirror kaleidoscope symmetry comes from the Auto-Looks generator.
Toggle Live Preview and the canvas itself becomes the render. Feed it the bundled animated test card, any image, or a live NDI or Spout feed, and switch between the Input Map view and the final Output view. The preview runs the same mapping math as the plugin (Looks, Focals, flips, cover-fit, and Scale; Zoom, Edge Feather, and Show Outlines are effect-only), so there are no surprises at the venue.
The companion Slice Studio effect gives you 16 Look sliders plus Scale, Zoom, Edge Feather and Show Outlines. Content is always cover-fit with the aspect ratio locked (circles never become eggs), and the effect hot-reloads your exported mapping about twice a second, so tweaks land without re-adding it.
Open R-Flow's FFGL Plugins app and click "Install ALL to Resolume (incl. glew32.dll)". This copies the Slice Studio effect (and its required helper file) into Resolume's plugins/vfx folder. Restart Resolume so it picks the plugins up.
In the Slice Studio app, click "Import XML" and pick an Advanced Output preset. The picker opens straight into your Documents > Resolume Arena > Presets > Advanced Output folder (OneDrive-synced Documents are found too). No show file handy? Click "Example Mapping" to load the bundled festival stage and follow along.

Every slice appears as a box on the Stage Layout canvas. Drag to move, use the corner handles to scale, Shift+drag for a lasso selection, and tap the arrow keys for fine-tune nudges (the hint bar under the canvas reminds you). "Select All" grabs every visible, unlocked panel, "Fit to View" zooms the whole map onto screen, and the Snap checkbox controls alignment help. In the Slices list, each panel has a visibility checkbox and a lock toggle.
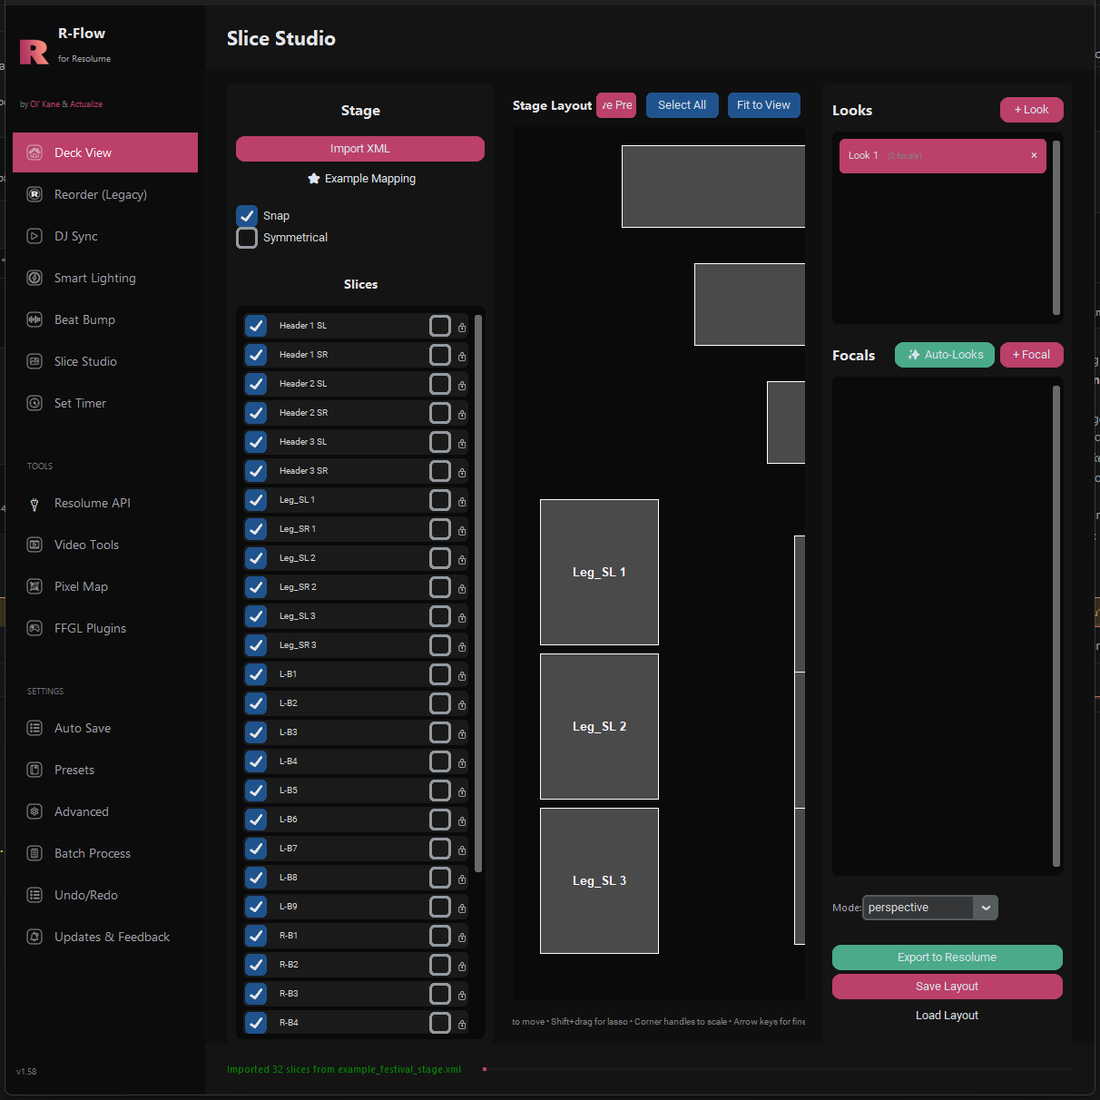
Click "+ Look" on the right (you can have up to 16). Select the panels you want to act as one surface, choose a Mode, either "perspective" (content spans across the group) or "duplicate" (each panel gets its own copy), then click "+ Focal". Repeat to add more Focals to the Look. Each Focal row has flip toggles for horizontal and vertical flips.

Click "Auto-Looks" to auto-generate a full set of Looks from your imported panels: a per-surface base look plus flip, mirror, duplicate and kaleidoscope variations. Note: this replaces your current Look list, so save first if you've built Looks by hand.
Click "Live Preview". Pick a source (Test Card, Image…, NDI or Spout) and flip between "Input Map" and "Output" views. The Output view shows exactly what the effect will render in Resolume for the currently selected Look; the slider next to the source menu previews the effect's Scale control.

Click "Export to Resolume" and save with the suggested name and location: slice_studio_looks.json inside Documents > Resolume > SliceStudio. This exact spot is where the effect looks for its mapping, so keep the default and it just works.

In Resolume, add the "Slice Studio" effect to a clip, layer or the composition. All 16 Look sliders start at 0%, so nothing changes until you push one up. Raise "Look 1" and your first layout fades in. Blend several sliders to mix layouts; areas outside your panels fade to black as Looks come up. Dial in "Scale" (100% = perfect cover fit; lower zooms out to show more), "Zoom" (centre magnify, 0.25x-4x), "Edge Feather" (soften panel edges to black for a glowing LED look) and "Show Outlines" (bright borders on every slice for alignment).
"Save Layout" writes a complete project file (.sslayout) with all slices, Looks and settings to Documents > Resolume > SliceStudio; "Load Layout" brings it back later. This is separate from "Export to Resolume", which produces the file the effect actually reads.

| Look 1-16 (effect sliders) | One opacity fader per Look, in the same order as your Look list. All start at 0%, so the effect passes video through untouched until you raise one. Several can be up at once; lower-numbered Looks draw on top when they overlap. |
|---|---|
| Scale (effect) | 100% is a perfect aspect-locked cover fit. Lower values zoom the content out so more of the clip is visible, letterboxing cleanly to black past its edges. |
| Zoom (effect) | Magnifies around the content centre, from 0.25x to 4x with the midpoint at exactly 1x. Independent of Scale, so it's ideal for animating. |
| Edge Feather (effect) | Fades each panel's content to black near its edges for a soft LED/glow look. 0 = hard edges. |
| Show Outlines (effect) | Draws an even-width bright border on every slice: a setup and alignment aid with consistent thickness on every panel. |
| Snap / Symmetrical (editor) | Snap aligns dragged panels to other panels' corners and the canvas centre. The Symmetrical checkbox is saved with your layout and reserved for a future symmetrical-snapping mode. |
| Mode (editor) | Per-Focal choice between "perspective" (content spans the whole panel group, closing physical gaps) and "duplicate" (each panel shows its own full copy). |
| Live Preview source & view (editor) | Source: Test Card, Image…, NDI or Spout. View: "Input Map" (raw content under the slice boxes) or "Output" (the effect's final render for the selected Look). |